

Introduction: How to Save AI Chatbot Conversations in Python
IIn this tutorial, I’m going to share my experience on how to save AI chatbot conversations in Python. I’ll walk you through simple, practical steps that I personally use to automatically store responses from an AI chatbot like ChatGPT into a local text file.
Lets Continue the tutorial From my experience, the very first thing you need is a live OpenAI API key. This key allows your Python program to communicate with the chatbot and get intelligent, human-like responses. (Note: OpenAI APIKEY we can create a free api but we cant use in our python code) will get an error 400: code check out this for more info Free API Key Doesn’t Work (Error code: 400 Explained)
Why Storing Chatbot Conversations Matters
I’ve found this method incredibly useful in real-world applications. Whether I’m developing a personal AI assistant or a customer support bot, saving chat history helps me track user interactions, debug responses, and improve the system over time. Keeping a record of conversations makes it much easier to analyze what’s working, what isn’t, and how I can make my AI chatbot more effective.
For example, on e-commerce platforms like Flipkart or Amazon, an AI chatbot like ChatGPT handles queries such as order tracking, returns, and refunds. From my experience, if the chatbot can’t resolve a user’s issue, it automatically transfers the conversation to a human support agent. Even in such cases, saving the initial chat ensures that I always have a complete conversation history for analysis, learning, and improving the bot’s performance.
How openai api store responses locally python
Iam using OpenAI apikey, which is responsible for communicating with the users responses in your chatbot. When a user types a message, the python code send that input to the openai and apikey processes the request using a trained ai model and returns like a human response, which is then displayed to the end user and saved into a file automatically( the file can be pdf, txt, word or database) any thing could be preferrable choice but, here in this tutorial iam using notepad or textfile to store Chatgpt Responses automatically
OpenAI is responsible for generating intelligent responses in your chatbot. When a user types a message, your Python code sends that input to the OpenAI API. The API processes the request using a trained AI model and returns a human-like response, which is then displayed to the user and saved into a file. Lets Jump Into the tutorial code and you may like this tutorial Text to Image AI Generator Using OpenAI API in Python (Step by Step) Visual Studio code
Requirements for Saving Chat History in Python
- Visual Studio Code for python coding
- OpenAI APIKEY
If you dont have the above software Visual Studio Install it and we need a valid openai apikey, so go to openai website and login with your gmail creditenals and create a new apikey.
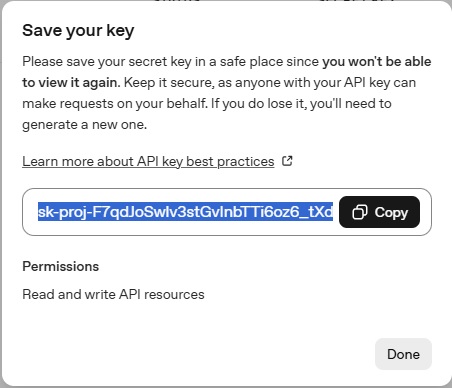
Once you create a secret key , the most important you have to save to apikey in a safe place before submit the done button. If you done without saving your apikey you wont be able to view it again. So, make sure save the secret key in a secure place
Setting Up Your Environment to Save Chatbot Conversations
Now, open Visual Studio Code and create two new files: Savechat_History.py and .env. The .env file (environment file) is a simple text file used to store configuration settings and sensitive data for your application. Open the .env file and paste the code below, replacing my API key with your own.

OPENAI_API_KEY="Your OPENAI APIKEY"
Next open python file which is in my case (Savechat_History.py) and first need to install required packages Run this in your terminal / command prompt:
pip install openai python-dotenv
How to save ai chatbot conversations in python Complete Source Code
from openai import OpenAI
from dotenv import load_dotenv
import os
load_dotenv(override=True)
client=OpenAI(api_key=os.getenv("OPENAI_API_KEY"))
def save_to_log(user_text,ai_response):
with open("Save_chat.txt","a",encoding="utf-8") as file:
file.write(f"User :{user_text}\n")
file.write(f"AI:{ai_response}\n")
file.write("-" *30 + "\n")
print("AI Chatbot Started ! (Type 'exit' to stop)")
while True:
user_input=input("You: ")
if user_input.lower()== "exit":
print("(Response Saved To a Save_chat.txt)")
break
response=client.chat.completions.create(model="gpt-4o-mini",messages=[{"role":"user","content":user_input}])
answer=response.choices[0].message.content
print(f"AI: {answer}")
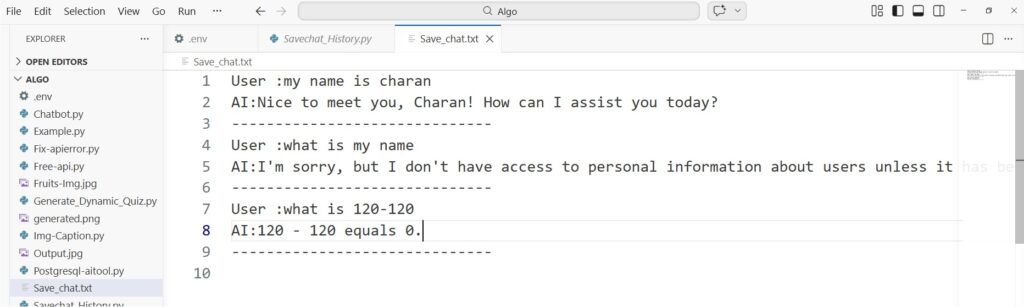
save_to_log(user_input, answer)Final Output Of this Code…
Checkout my latest ai tools tutorials with python realtime examples , perfect for beginners who want to start a career as an AI Engineer or AI Developer.
Video tutorial how to save ai chatbot conversations in python
Complete Code Explanation (Short)
- Load API Key: Uses
dotenvto securely load your OpenAI API key. - Initialize Client: Connects Python to the OpenAI API.
- User Input: Takes input from the user in a loop.
- Generate Response: Sends input to OpenAI and gets AI reply.
- Display Output: Prints the chatbot response on screen.
- Save to File: Stores user input and AI response in a text file.
- Loop Control: Runs continuously until user types
exit.
Handling Errors While Saving Chatbot Conversations
1. API Key Not Found Error
Error: OpenAI authentication failed or API key missing
Fix:
Make sure your .env file contains:
OPENAI_API_KEY=your_api_key_here
Also verify you are using:
os.getenv("OPENAI_API_KEY")2. Module Not Found Error
Error: ModuleNotFoundError: No module named 'openai'
Fix:
Install required libraries:
pip install openai python-dotenv
3. File Not Saving
Error: Chat is not stored in the text file
Fix:
- Check file path
- Ensure
"a"(append mode) is used - Verify function is called:
save_to_log(user_input, answer)
4. Encoding Issues
Error: Special characters not saved properly
Fix:
Use UTF-8 encoding:
open("Save_chat.txt", "a", encoding="utf-8")Best Practices for Python Chatbot Save Chat History
From my experience, there are a few key practices that make saving chat history with an AI chatbot like ChatGPT much more effective. First, I always limit the conversation history I send to the API. This not only reduces token usage but also improves performance, which is especially important when your bot is handling many users simultaneously.
Second, I maintain a structured log file. I make sure every user message and AI response is appended in an organized format with timestamps. This makes it easy to review past conversations, debug errors, and analyze user behavior over time.
Third, I use proper file encoding (UTF-8) to ensure that all characters, including emojis and special symbols, are stored correctly. I’ve learned that neglecting this can cause weird errors when reading the logs later.
Lastly, I periodically back up my conversation logs. From my experience, having a backup helps prevent data loss and makes long-term analysis more reliable. By following these best practices, I can ensure that I’m efficiently managing my chatbot logs while building a robust system for learning and improvement.
F.A.Q Technical AI Engineering Mock Interview Questions and Answers
1. Explain your chatbot project.
Answer:
I built a chatbot using the OpenAI API in Python. The chatbot takes user input, sends it to the API, and displays the AI-generated response. I also implemented a feature to save conversations into a text file, which helps in tracking user interactions and debugging. This project demonstrates API integration, file handling, and basic chatbot design.
2. How do you handle conversation memory?
Answer:
I store previous messages in a list and send them with each API request. This allows the chatbot to understand context and respond more accurately. For long conversations, I limit the history to reduce token usage.
3. What challenges did you face while building the chatbot?
Answer:
One challenge was handling API responses and ensuring the chatbot didn’t return empty or incorrect outputs. I resolved this by validating responses and improving prompt structure. Another challenge was saving data correctly, which I solved using file handling in append mode.
4. How do you optimize API usage and cost?
Answer:
I reduce token usage by limiting conversation history and using concise prompts. I also set max token limits and avoid unnecessary API calls, which helps control cost and improve performance.
Conclusion
Wrapping up this project, I can confidently say that learning how to save AI chatbot conversations in Python has been a game-changer for me. From my personal experience, keeping a log of every interaction with an AI chatbot like ChatGPT not only helps in debugging and improving responses but also provides valuable insights into user behavior and needs.
Through this tutorial, I’ve shown how setting up a proper environment, using an OpenAI API key, and writing a simple Python script can allow you to automatically save all conversations into a text file. In my practical experience, structured logs with timestamps make reviewing past chats far easier and more effective, especially when analyzing patterns or training future versions of the chatbot.
Moreover, following best practices like limiting conversation history for API efficiency, maintaining proper file encoding, and backing up logs has made my workflow smoother and more reliable. Over time, this approach has helped me make my AI chatbots smarter, more responsive, and user-friendly.
In short, if you are building an AI assistant or a customer support bot, implementing a system to save AI chatbot conversations in Python is not just useful—it’s essential. From my hands-on experience, this small step of logging chats can significantly improve the performance, reliability, and intelligence of your AI chatbot projects.